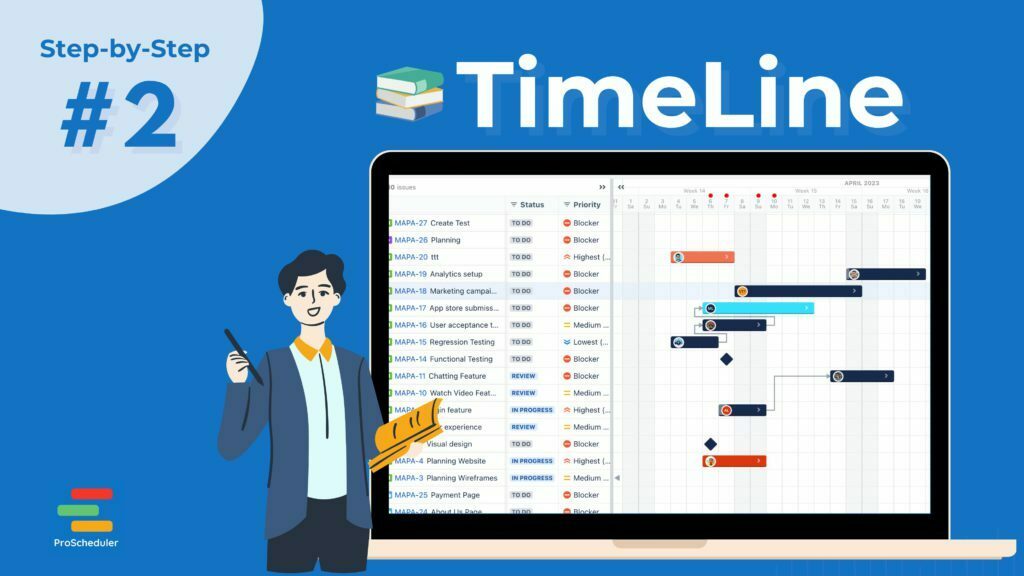
Introduction to TimeLine in Jira
Welcome back to our step-by-step guide on using the TimeLine feature in Jira with TeamBoard ProScheduler. In this article, we will delve deeper into the various features and functionalities offered by TimeLine, which will help you create a visual representation of your project schedule. With TimeLine, you can effectively track project progress, identify dependencies, and make informed decisions to keep your project on track. So let’s get started!
Understanding Task Hierarchy in TimeLine
The TimeLine feature in Jira aligns with the task hierarchy established by Jira’s Issue hierarchy. This hierarchy includes Epics, Issues, and Sub-tasks, which help organize and structure tasks effectively. On the other hand, the Gantt chart in TeamBoard ProScheduler offers a customizable hierarchy based on the Work Breakdown Structure (WBS) number. This flexibility allows users to tailor the project structure to their specific needs.
Step-by-Step Guide
Now, let’s dive into a step-by-step guide to help you utilize the TimeLine feature effectively:
Step 1: Access the TimeLine
To access the TimeLine feature using TeamBoard ProScheduler
- First, Log in to TeamBoard ProScheduler
- After logging in, you will be presented with the main dashboard
- Look for the tab menu at the top of the screen. Locate and select the “TimeLine” tab from the menu.
Step 2: Customize the View
Once you have accessed the TimeLine feature, it’s time to customize your view according to your preferences. Here’s how you can do it: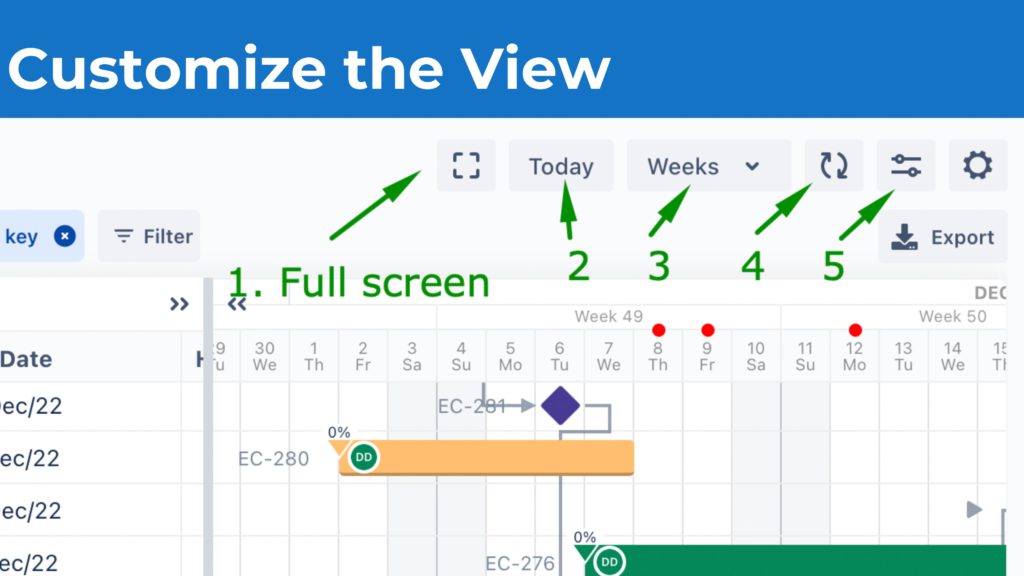
- Use the Timeline menu options to maximize the Timeline view to full screen if desired.
- Click on the “Today” button to quickly move the timeline focus to the current day.
- Select the appropriate view mode from Weeks, Months, or Quarters to adjust the level of detail displayed on the TimeLine.
- If you need to refresh the data and update the timeline without refreshing the entire page, simply click on the “Refresh” option.
- Customize the display of the timeline using the “View settings” option. You can choose to show completed tickets, enable or disable the column divider, control lazy loading of issues, highlight weekends, show the issue key and summary on the timeline bar, display details tooltip, and show progress.
Step 3: Utilize the Timeline Toolbar
The Timeline toolbar provides additional functionality to enhance your TimeLine experience. Here’s how you can make use of its features: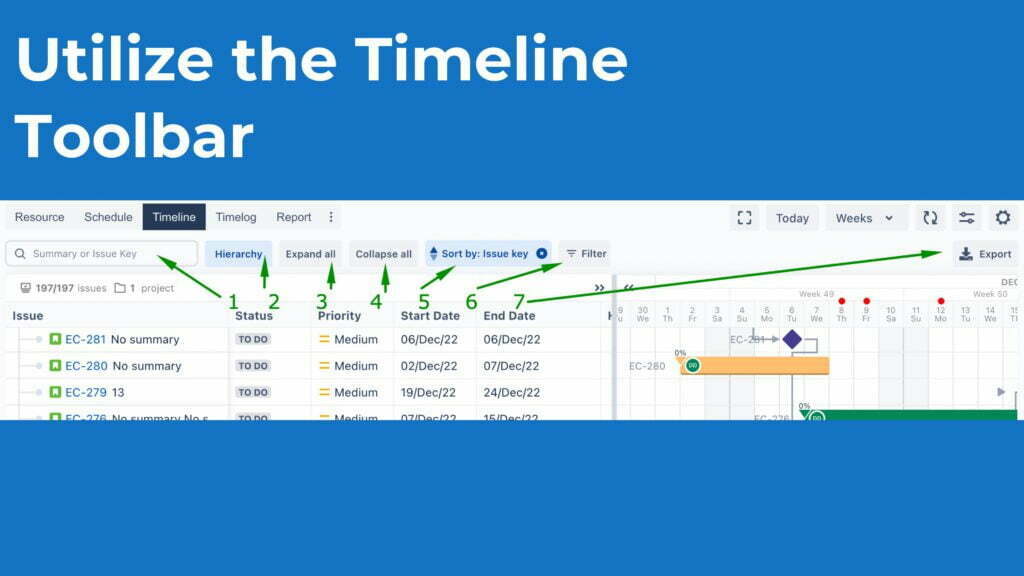
- Use the “Search” option to quickly search for specific issues based on the issue summary or issue key. This helps you locate and focus on relevant tasks within your project.
- Enable or disable the “Hierarchy” option based on your preference. When enabled, the issue hierarchy follows the structure established by Jira’s Issue hierarchy (Epic → Issue → Sub-task). When disabled, all issues are displayed in a flat structure.
- Expand or collapse all dependencies by using the “Expand all” or “Collapse all” options. This allows you to gain a better understanding of the project structure and relationships between tasks when the hierarchy is enabled.
- Sort issues based on specific criteria such as the issue key, summary, start date, end date, or fix versions. This helps you organize and prioritize your tasks effectively.
- Utilize the “Filter” option to enable or disable quick filters, allowing you to focus on specific subsets of your project.
- If you need to export the TimeLine data for further analysis or sharing, click on the “Export” option to export issues to an Excel file.
Step 4: Work on the TimeLine
The TimeLine provides several interactive features that allow you to work directly on the timeline itself. Here’s what you can do: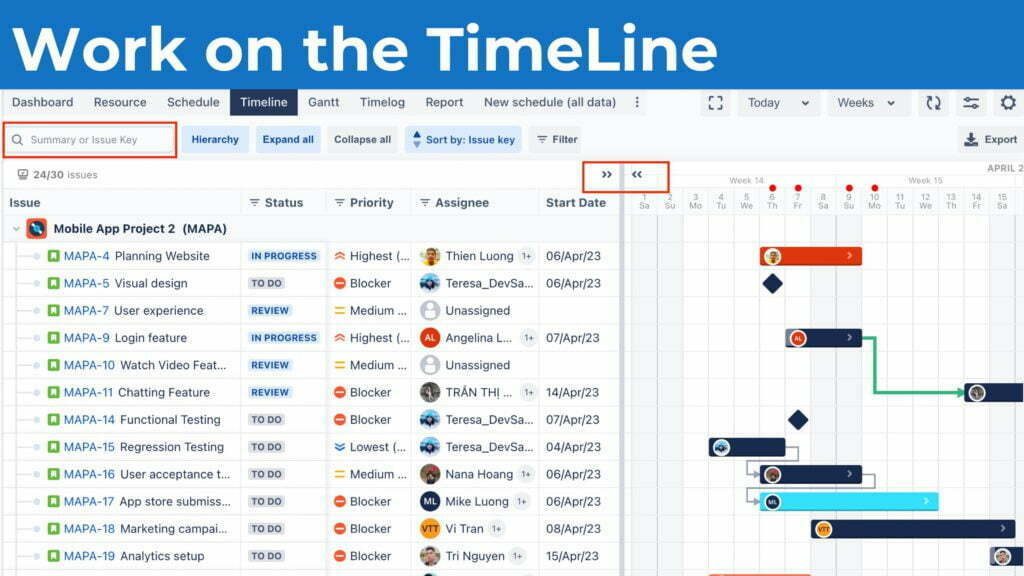
- Update issues inline: Modify task details directly in the Issue table without navigating to separate screens. This includes updating start and end dates, duration, assignees, and other relevant information.
- Expand the full Issues table: Click on the expand icon (>>) to expand the full Issues table, providing a comprehensive overview of your project’s tasks in an Excel-like view.
- Schedule tasks: Easily schedule tasks by dragging and dropping the task bars to different dates on the TimeLine. This allows for effortless rescheduling and rearranging of tasks.
- Establish dependencies: Connect tasks on the TimeLine to create dependencies between issues. Click on a taskbar, drag the connector to another task, and release to establish a dependency. This helps visualize and manage the relationships between tasks effectively.
- Search for issues: Utilize the search functionality to find specific issues, and the results will be displayed in a highlighted list. This helps you quickly locate and focus on the tasks you’re interested in.
- Include milestones: If your project has significant events or goals, add milestones to the TimeLine to mark those key points. This provides a clear indication of important milestones and helps track their progress.
Step 5: Save and Share Your TimeLine
Once you have customized your TimeLine, updated tasks, and established dependencies, it’s essential to save your work. Jira automatically saves your changes as you make them, ensuring that your TimeLine is up to date.
Suppose you need to share your TimeLine with stakeholders or team members. In that case, you can do so by taking a screenshot of the TimeLine or by exporting the TimeLine data to an Excel file using the “Export” option in the Timeline toolbar. This allows you to share the visual representation of the project schedule or provide the data for further analysis and collaboration.
Tips for Using TimeLine Effectively:
Keep your TimeLine up to date: Regularly update the TimeLine with the latest information regarding task progress, start and end dates, and any changes in dependencies. This ensures that the TimeLine remains an accurate reflection of your project schedule.
Utilize the search and filtering options: Take advantage of the search and filtering capabilities to quickly locate specific issues or focus on specific subsets of your project. This helps you navigate and manage your project more efficiently.
Leverage the drag and drop functionality: Use the drag and drop feature to easily adjust the scheduling of tasks on the TimeLine. This allows you to adapt to changing requirements and optimize your schedule.
Visualize dependencies: Take advantage of the ability to establish dependencies between tasks on the TimeLine. This visual representation of task relationships helps you identify critical paths, manage dependencies effectively, and ensure that tasks are executed in the correct order.
Communicate and collaborate: Share your TimeLine with stakeholders, team members, or clients to provide a clear visual representation of the project schedule. This fosters effective communication, alignment, and collaboration among all project stakeholders.
Conclusion
The TimeLine feature in Jira using TeamBoard ProScheduler offers a powerful tool for visualizing and managing project schedules. By understanding the task hierarchy, customizing the view, utilizing the toolbar options, working directly on the TimeLine, and following the step-by-step guide provided, you can effectively leverage the TimeLine feature to track project progress, identify dependencies, and make informed decisions to keep your projects on track. With the ability to customize, update, and share your TimeLine, you can enhance collaboration, communication, and project management efficiency.
Getting Help and Support
While we’ve strived to provide a comprehensive guide for resource planning using TeamBoard ProScheduler in Jira, we understand that you might still encounter challenges or have specific questions related to your individual circumstances.
Rest assured, our dedicated support team is always ready and willing to help you navigate these challenges and ensure a smooth user experience. If you need any assistance, please don’t hesitate to contact our support desk. Our experts are equipped to provide guidance, troubleshoot issues, and help you utilize the software to its full potential.
Remember, we’re only a message away. Your success is our success, and we’re here to make your resource planning journey as seamless as possible.
RESOURCE PLANNING IN JIRA USING TEAMBOARD PROSCHEDULER | STEP-BY-STEP GUIDE #1