Learn the essential steps for logging time in Jira using TeamBoard TimePlanner. This guide focuses on the “how-to” aspect of time logging in Jira, ensuring you master the process effortlessly. With clear instructions and insights, you’ll streamline your project’s time management effectively and efficiently.

Table of Contents
Understanding Jira TimeLog
Jira Timelog feature plays a pivotal role in project management, allowing users to precisely track and document the time devoted to tasks within a project.
What is Timelog?
Timelog refers to the process of recording the time spent on various tasks and activities within a project. It helps to track productivity, analyze resource allocation, and estimate project timelines accurately.
By logging time in Jira, you can keep a detailed account of how much time is being spent on different tasks, identify bottlenecks, and make informed decisions based on the data. Additionally, time logs can be associated with specific issues, projects, or even individual team members.
The Importance of Logging Time in Jira
Logging time in Jira brings several benefits to project management. Here are some key reasons why time logging is important:
- Accurate Project Tracking: Timelog allows you to track the time spent on each task or issue, providing a clear picture of project progress. Also, it helps in identifying any delays or issues that may arise during the project.
- Resource Allocation: By tracking time spent on different tasks, you can identify how resources are being allocated within the project. This information can help in optimizing resource allocation and ensuring that everyone is working on the right tasks.
- Estimation and Planning: Timelog data provides valuable insights into how long each task takes to complete. This can be used to estimate future tasks and plan project timelines more accurately.
- Productivity Analysis: Timelog helps in analyzing individual and team productivity. By comparing estimated time and actual time spent on tasks, you can identify areas for improvement and optimize workflows.
How to Log Time in Jira using TeamBoard TimePlanner
TeamBoard TimePlanner is a powerful plugin for Jira that makes time logging intuitive and efficient. With TimePlanner, you can easily create time logs directly from the board and facilitate accurate tracking and direct recording of the time invested in resolving an issue within your work log.
Here’s how you can do it:
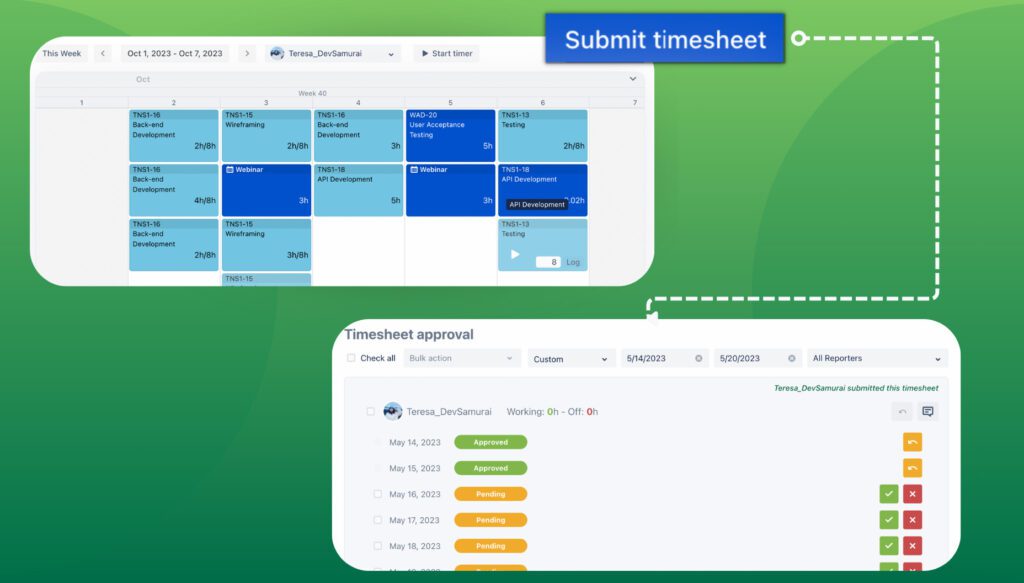
Log time in TimePlanner board
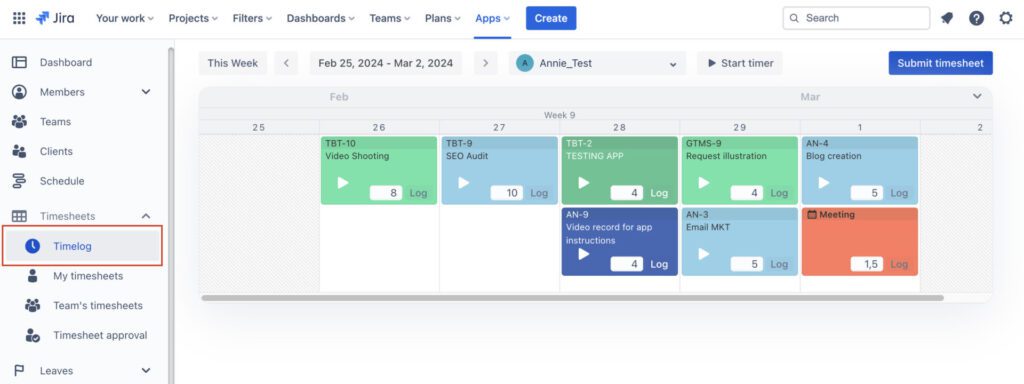
Users can log in and submit his/her time on the scheduled tasks. Moreover, the administration will have permission to log time and submit on behalf of other members.
To log time, access the “Timesheet” tab and navigate to “Timelog“.
1. Timelog details
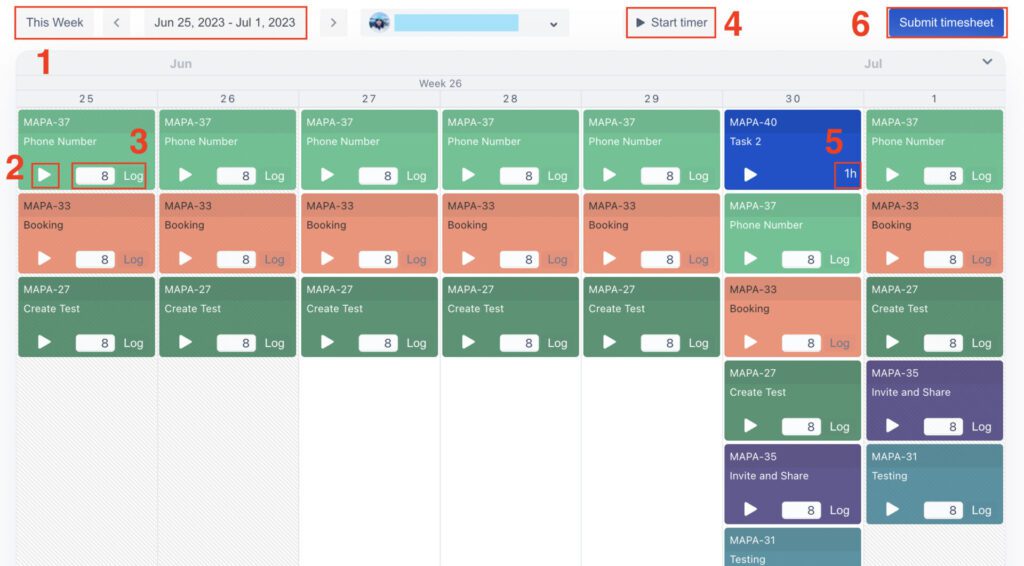
- Time View Range: By adjusting the time view range, you can specify the timeframe for task viewing, offering greater control and clarity.
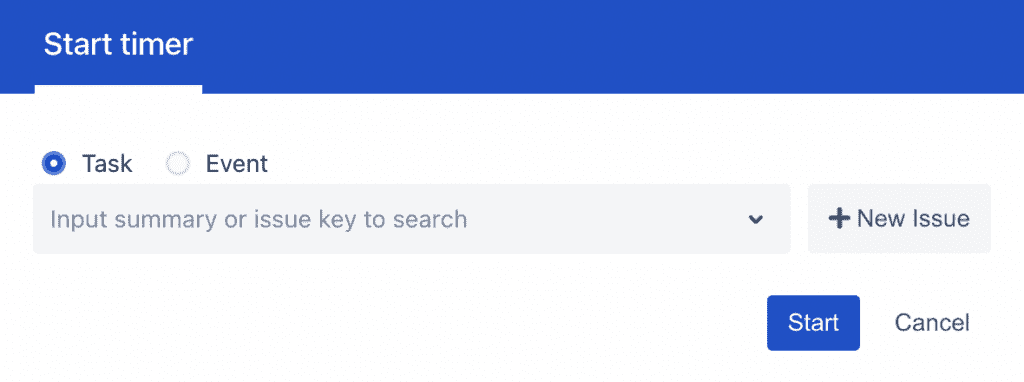
- Start Timer quick button: Take advantage of the “Start Timer” quick button to automatically track task duration, enhancing efficiency and accuracy in time tracking.
- Logging Time: Input time for scheduled tasks within the designated period, then click “Log” to record time entries, streamlining the time-logging process.
- Start Timer: Begin tracking time spent on each specific task, allowing for detailed monitoring, and easily review the comprehensive time log for insightful analysis and review.
- Time Log: This number is your record of all logged time.
- Submit TimeSheet: Submit your timesheet upon completing all tasks.
2. Log time on Issue Detail
For those using Jira’s Cloud edition, there’s the added convenience of logging time straight from the issue details screen without accessing the TeamBoard TimePlanner board
Firstly, access specific issues where you want to log time in Jira and then open the TeamBoard TimePlanner panel.
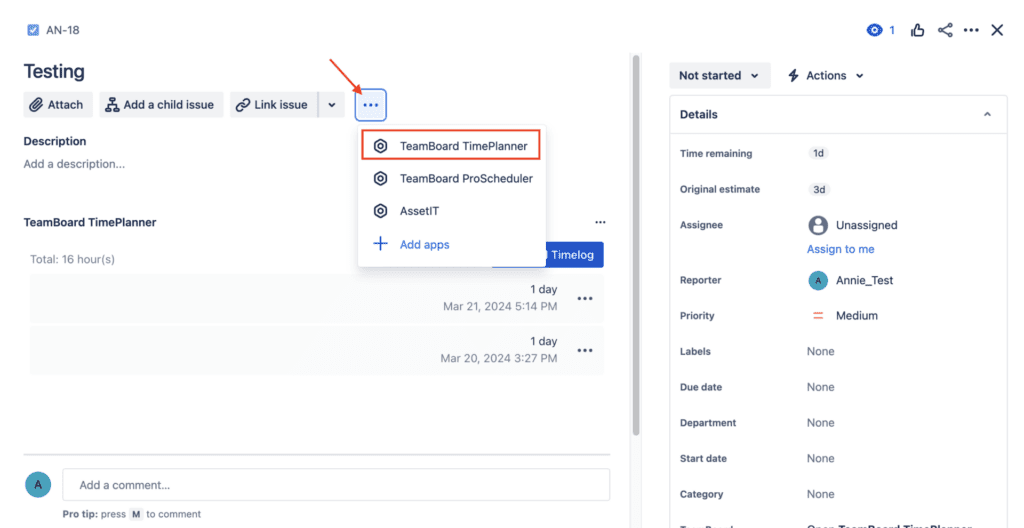
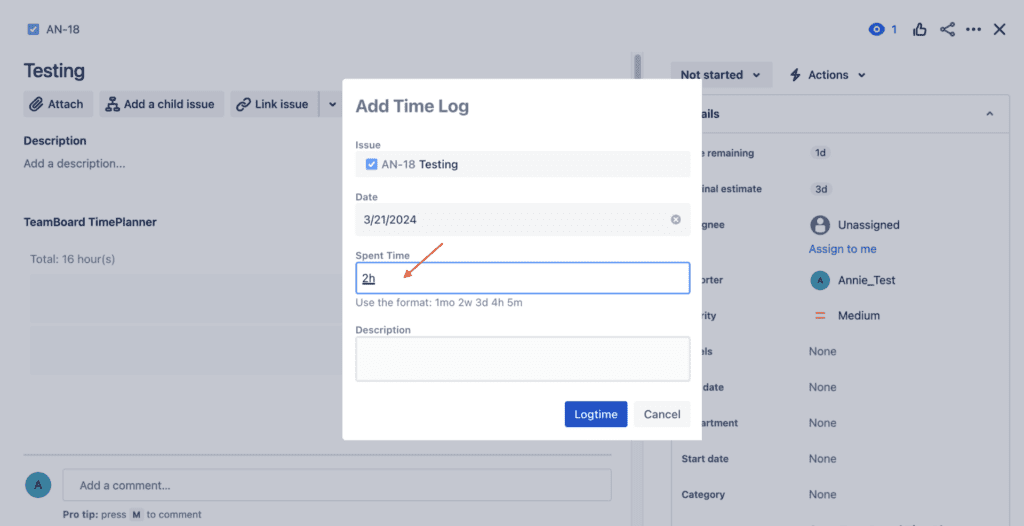
Click on Add Timelog to initiate the time-logging process where you can input the details of your activities and track the time spent on them. After that, fill in your time log and once you have entered the time, click the “Log Time” button to save the time log for the issue.
Additionally, you can use the Start Timer button to help you record a task or event in real time. Once you stop the Timer and it will be saved based on your current day.

Timesheets Approval
After you log all your time you can submit them to your manager/approver for review. Subsequently, your manager can get a notification from the reporter through email or directly in this app.
Timesheets that were sent to the user to approve are listed in Timesheets → Timesheet Approvals

- The approver can filter the list by time and reporter.
- The approver can accept/reject or comment on each reported day, to return the record to the reporter the approver can choose to unsubmit it. Additionally, those actions can be done for each record or bulk action for multiple records.
- When a timesheet gets rejected or unsubmitted the reporter can edit and re-submit again
Team’s timesheets
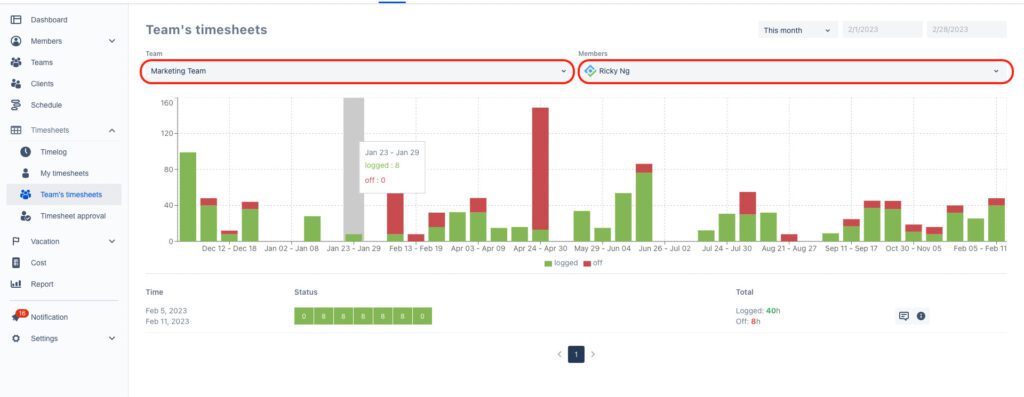
The Team’s Timesheet is accessible only by the team leader and provides an overview of each team member’s activities.
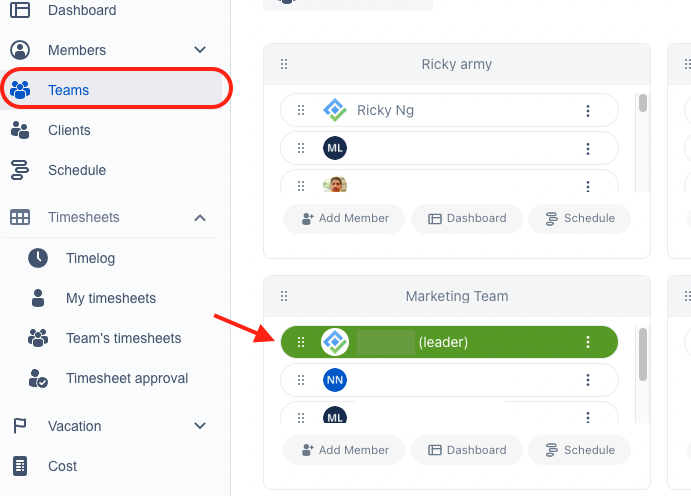
To view it, go to Timesheets, select your team, and then select a member to view their timesheet within a specific timeframe.
Conclusion
Mastering time logging in Jira with TeamBoard TimePlanner proves crucial for efficient project management. This guide provides users with essential steps to effectively track time, facilitating improved project progress tracking and resource management. By adopting these practices, teams can significantly enhance productivity and effectively achieve their project goals.
For more details on how to use TeamBoard TimePlanner, take a look at our comprehensive User Guide. If you need further assistance, don’t hesitate to reach out to our support desk – we’re here to help!


